
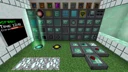
RFTools · Late game
RFTools Shield Projector & Spawner Mob Farm
This late-game setup automates hostile mob farming by pairing the RFTools Spawner with a lethal Shield Projector chamber. It allows you to generate specific mob drops on demand by converting base materials into living entities and instantly eliminating them inside a solid energy barrier. Build this when you need massive quantities of rare drops like Nether Stars, Ender Pearls, or Blaze Rods without leaving your base.
- Footprint
- 7x7x5 blocks
- Power
- ~5-20 kFE/t depending on target mob (check JEI)
- Throughput
- ~1-3 mobs/sec depending on entity mass
- Difficulty
- advanced
Flow diagram
How items, fluids and energy move through the setup, left to right.
Swipe sideways to see the whole diagram
Materials
| Item | Count |
|---|---|
| Spawner | 1 |
| Matter Beamer | 3 |
| Syringe | 1 |
| Smart Wrench | 1 |
| Shield Projector Tier 3 | 1 |
| Blue Shield Template | 45 |
| Powercell (or Advanced Powercell) | 1 |
| Modular Storage | 2 |
| Storage Module Tier 3 | 2 |
| Item Absorber | 1 |
| Experience Absorber | 1 |
| Hopper | 4 |
| Lever | 1 |
| Redstone Dust | 5 |
Build it step by step
1Sample the Target Mob
Craft a Syringe and punch your desired hostile mob until the Syringe reaches 100% essence. You will need to hit the mob multiple times to fill it completely. Keep this filled Syringe safe, as it acts as the blueprint for the Spawner.
2Place the Spawner and Matter Beamers
Place the Spawner in the center of your designated area, raised one block off the ground. Place three Matter Beamers two blocks away from the Spawner, leaving an air gap between them. Equip your Smart Wrench, right-click a Matter Beamer, and then right-click the Spawner to link them; repeat this for all three Beamers.
3Wire Redstone and Material Inputs
Matter Beamers require an active redstone signal to operate. Run Redstone Dust over all three Beamers and attach a Lever to toggle the farm on and off. Place an input Modular Storage feeding into the three Beamers via Hoppers to supply the three required matter types: Primary (mob-specific item), Bulk (like Dirt), and Living (like Wheat or Potatoes); check JEI with your Syringe to see exact material ratios.
4Build the Shield Template Cage
Construct a hollow 5x5x4 cage around the Spawner using Blue Shield Templates, ensuring the Spawner is inside the hollow interior. Leave the bottom floor as regular building blocks, or integrate the templates into the floor so mobs cannot glitch out. Ensure the Matter Beamers sit outside or flush with the cage wall so you can still access their inventories.
5Configure the Shield Projector
Place a Shield Projector Tier 3 directly touching any outer block of your Blue Shield Template cage. Open the Projector GUI and click 'Compose' to transform the templates into a shield grid. Add a filter for 'All' set to 'Solid', and another filter for 'Hostile' set to 'Solid' and 'Damage'. Select 'Player' as the damage type if you want player-kill-only drops like Blaze Rods or Experience.
6Install Drop Collection and Power
Embed an Item Absorber and an Experience Absorber into the floor of the containment chamber. Place a Hopper beneath the Item Absorber leading into an output Modular Storage unit fitted with a Storage Module Tier 3. Finally, connect your Powercell to the Spawner, the three Matter Beamers, and the Shield Projector to energize the system, then activate the Shield and flip the Lever.
How it works
The RFTools Spawner does not create mobs out of pure energy alone; it requires physical mass converted into energy beams. Every mob recipe requires three categories of ingredients: a specific catalyst (like a Nether Star for Wither Bosses or Ender Pearl for Endermen), a bulk block (such as Cobblestone or Dirt), and biological matter (such as Potatoes, Wheat, or Seeds). The three Matter Beamers break down these items and fire glowing lasers into the Spawner, filling its internal matter buffers.
Once the Spawner accumulates enough Forge Energy and all three matter requirements are met, it instantly materializes the mob inside the chamber. Because the Shield Projector is configured to apply 'Solid' and 'Damage' properties across all interior and perimeter Shield Templates, the spawned entity is immediately trapped and damaged by the shield wall.
Setting the Shield Projector damage mode to 'Player' simulates a real player strike, which forces mobs to drop rare loot and XP orbs that normally wouldn't drop from environmental damage. Note that Player damage mode consumes slightly more power per tick than Generic damage. The Item Absorber and Experience Absorber vacuum up the resulting drops through the shield without needing you to ever breach the containment field.
Upgrades and scaling
- Infuse the Matter Beamers, Spawner, and Shield Projector to 100% in a Machine Infuser using Dimensional Shards; this drastically reduces power consumption and significantly speeds up laser transfer and spawning rates.
- Add multiple Matter Beamers dedicated to the 'Living' and 'Bulk' material slots if you are spawning high-mass bosses like the Wither, as a single Beamer will bottleneck the spawn rate.
- Insert a Night Vision or Regeneration environmental module nearby, or upgrade to a Shield Projector Tier 4 if you plan on expanding the cage size to farm giant entities like Ghasts.
Common mistakes
- Forgetting to apply a redstone signal to the Matter Beamers; unlike most RFTools machines, Beamers default to requiring an active redstone signal to fire their lasers.
- Forgetting to click 'Compose' and turn the Shield Projector on before flipping the Matter Beamer lever, resulting in hostile mobs escaping into your base.
- Setting the Shield filter for 'Hostile' only to 'Damage' without also ticking 'Solid', which allows the mobs to walk right through the lethal barrier while taking only a single tick of damage.
- Placing the Shield Templates only as an outer wall instead of filling the inner spawn blocks where the mobs stand; if the inside is completely hollow and large, mobs will only take damage if they wander into the walls. Place a pillar of templates inside the cage to damage them immediately upon spawning.
FAQ
How do I know which items to put into the Matter Beamers for a specific mob?
Look up the Spawner in JEI or press the recipe key on a filled Syringe. It will display the exact items needed for the Primary, Bulk, and Living matter slots along with the exact quantities required per spawn.
Can this setup farm the Wither safely?
Yes. An active RFTools Shield block is completely immune to Wither explosions and projectiles, making this one of the safest automated Wither killers available, provided your Powercell never runs out of energy.
Why is my Shield Projector draining all my power when a mob spawns?
Applying 'Player' damage to mobs consumes a burst of Forge Energy per hit on top of the passive shield upkeep. Infusing the Shield Projector with Dimensional Shards and only placing enough internal templates to cover the spawn area will keep power usage manageable.