
RFTools · Late game
RFTools Control Programmable Processing Line
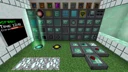
This RFTools Control Programmable Processing Line automates on-demand resource smelting, complex crafting, and dynamic item routing through a single centralized brain. By utilizing a Processor, Crafting Stations, and wireless Nodes, this setup eliminates sprawling pipe networks in favor of pure visual-code logic. It is ideal for late-game bases that need a compact, hyper-intelligent factory capable of handling multi-step recipes and raw ore bottlenecks without laggy item conduits.
- Footprint
- 7x5x3 blocks
- Power
- Moderate continuous drain (~500 - 2,000 RF/t at full load; check JEI and mod configs)
- Throughput
- Up to 4 parallel tasks per tick (dependent on CPU core tier)
- Difficulty
- advanced
Flow diagram
How items, fluids and energy move through the setup, left to right.
Swipe sideways to see the whole diagram
Materials
| Item | Count |
|---|---|
| Processor | 1 |
| Programmer | 1 |
| Crafting Station | 1 |
| Workbench | 1 |
| Node | 2 |
| CPU Core EX2000 | 4 |
| RAM Chip | 4 |
| Network Card | 1 |
| Advanced Network Card | 1 |
| Graphics Card | 1 |
| Program Card | 3 |
| Crafting Card | 16 |
| Token | 8 |
| Modular Storage | 2 |
| Storage Module Tier 3 | 2 |
| Crafter Tier 3 | 1 |
| Powercell | 1 |
| Blast Furnace | 2 |
Build it step by step
1Place the Control Core
Start by placing your Processor in the center of the workspace, flanked immediately by the Crafting Station and the Modular Storage blocks (one for Input, one for Output). Place the Programmer and Workbench nearby for easy card editing. Connect the Powercell directly to the Processor so it has continuous RF/FE.
2Install Processor Hardware
Open the Processor GUI and insert the CPU Core EX2000s, RAM Chips, the Advanced Network Card, and the Graphics Card into their respective expansion slots. Allocate the internal inventory slots of the Processor by clicking them in the GUI to assign specific buffers to your upcoming programs. Without allocated internal slots, the Processor cannot hold items in transit.
3Set Up Remote Processing Nodes
Place your Blast Furnaces a few blocks away and attach the first Node directly against them. Place the Crafter Tier 3 (powered by the Powercell) nearby and attach the second Node to it. Open both Nodes, assign them unique channel names like 'Smelter' and 'Assembler', and configure the Processor onto the same network frequency identifier.
4Program the Crafting Cards
At the Workbench, insert your blank Crafting Cards and encode your desired recipes, such as smelting raw iron into iron ingots, or crafting redstone and iron into machine frames. Place these encoded Crafting Cards directly into the Crafting Station or the Processor's card slots depending on whether they are push-based or request-based.
5Write the Visual Code in the Programmer
Place a blank Program Card into the Programmer and build two main Opcode chains. The first chain should begin with an 'Event: Craft Request' connected to 'Push Items' (sending raw materials to the 'Smelter' Node), followed by a 'Wait' or 'Eval' loop that pulls the finished ingots back when complete. The second chain should use a 'Timer' event to constantly scan the Input Modular Storage, pulling raw ores and automatically routing them through the system.
6Compile and Boot the Line
Save the visual program to the Program Card and insert it into the Processor's program slot. Open the Processor's terminal screen to verify there are no missing slot allocations or syntax locks, and test an on-demand job from the Crafting Station GUI.
How it works
At the heart of this setup is the RFTools Control Processor, which acts as a multi-threaded central computer rather than a standard item pipe. When you request an item at the Crafting Station—or when an automated Timer event fires—the CPU Core EX2000 picks up the event and reads the corresponding Opcode instructions from your Program Card. Because the Processor has an Advanced Network Card installed, it doesn't need physical cables reaching the machines; it communicates wirelessly with the named Nodes up to 17 blocks away.
During execution, the Processor pulls the required ingredients from the Input Modular Storage into its own internal allocated inventory buffers. From there, the 'Push Items' opcode teleports the items directly through the specified Node and into the correct face of the Blast Furnace or Crafter Tier 3. Remember that vanilla furnaces are side-sensitive: the program must explicitly target the top face of the Blast Furnace for ores, the side face for fuel, and pull from the bottom face for finished ingots.
For complex multi-stage recipes, the Processor uses Tokens and internal variables to track crafting states without jamming the machines. Once the Crafter Tier 3 or Blast Furnace finishes its work, the Processor pulls the result back through the Node, checks if it satisfies an active Craft Request ticket, and deposits the final product neatly into the Output Modular Storage.
Upgrades and scaling
- Swap any lower-tier CPU cores for four CPU Core EX2000 units and infuse the Processor with Dimensional Shards in a Machine Infuser to maximize execution speed and lower power draw.
- Add a Storage Scanner to the network so the Processor can pull and push items across your entire base's storage system rather than relying solely on adjacent Modular Storage blocks.
- Install a Fluid Card into the Processor and attach Nodes to fluid tanks to expand your visual code to support liquid-based recipes alongside solid item processing.
- Expand the Crafter Tier 3 setup by keeping common prerequisite crafts (like compressed cobblestone or basic circuits) running in 'Keep' mode inside its internal buffer before the Node pulls the final step.
Common mistakes
- Forgetting to allocate internal inventory slots and variable registers in the Processor GUI; if a program tries to pull an item into an unallocated slot, the thread will immediately halt with an exception.
- Targetting the wrong block face in the 'Push Items' or 'Fetch Items' opcodes—remember that the 'Inventory' side refers to the direction from the Node to the machine, and vanilla Blast Furnaces require top insertion for inputs and bottom extraction for outputs.
- Writing infinite evaluation loops without adding a 'Wait' opcode, which will quickly starve all four CPU cores and freeze other crafting requests waiting in the queue.
- Failing to name the Nodes or leaving the Processor's network channel blank, resulting in 'Node Not Found' errors on the terminal log.
FAQ
Why is my Processor stuck on 'Wait for Item' during a crafting request?
Check your extraction opcode's face settings and ensure the machine actually finished processing. If you are pulling from a vanilla Blast Furnace, you must extract from the Down face relative to the furnace, while telling the Node which specific side of itself the furnace is attached to.
How do I debug a program that stops working mid-cycle?
Install a Graphics Card into the Processor and click the Monitor tab in its GUI. You can type 'db' or inspect the active thread status and exception logs to see the exact Opcode box where the CPU core got stuck.
Can the Processor craft recipes directly without using an external Crafter Tier 3?
Yes, the Processor can execute standard 3x3 crafting recipes internally if it is adjacent to a Workbench, or you can offload fast bulk and multi-step recipes to the Crafter Tier 3 to save CPU cycles and internal buffer slots.