
OpenComputers · Setup guide · Advanced
How to Build a Wireless Network and Server Rack Infrastructure
In this advanced guide, you will learn how to construct a centralized server infrastructure and a multi-node wireless network in OpenComputers. Mastering Server Racks, Access Points, and Linked Cards allows you to centralize your Lua processing power and automate remote areas of your base without running endless lines of physical Cable.
What you need
- Server Rack and at least two Server items (Tier 2 or Tier 3 recommended)
- Components for each Server: CPU, Memory, Graphics Card, Hard Disk Drive, EEPROM (Lua BIOS), and OpenOS Floppy Disk
- Terminal Server (rack mountable component) and Remote Terminal
- Power Converter and a reliable energy source from a compatible power mod
- Cable blocks, Relay, and Access Point (or Wireless Network Card Tier 2)
- Wireless Network Cards (Tier 1 or Tier 2) and a pair of Linked Cards
- At least one standard Computer Case setup (Screen, Keyboard, Disk Drive) to act as a remote client node
Step by step
1Assemble the Server Units
Hold a Server item in your hand and right-click to open its internal component inventory. Install a CPU, Memory modules, a Graphics Card, a Hard Disk Drive, and a Lua BIOS EEPROM just as you would inside a standard Computer Case. For your primary routing server, install both a Wireless Network Card and one Linked Card from a matched pair. Save the second Linked Card for a remote outpost computer.
Tip: Tier 3 Servers provide component Buses that allow you to connect way more hardware than a standard Tier 3 Computer Case.
2Configure the Server Rack and Power
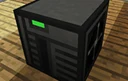
Place your Server Rack down and connect it to a Power Converter via OpenComputers Cable, or place the Power Converter directly adjacent to the rack. Open the Server Rack GUI and insert your assembled Server into the top slot, and a Terminal Server into the slot below it. Notice the routing lines in the GUI: click the nodes on the right side of the Server to connect its output to a specific side of the rack, or leave it on the internal bus so components inside the rack can talk to each other.
Tip: If you place a Disk Drive adjacent to the Server Rack, make sure the Server's node connection in the rack GUI is routed to the physical side touching that Disk Drive so you can install OpenOS.
3Bind the Remote Terminal and Install OpenOS
Shift-right-click the Server Rack while holding a Remote Terminal to bind it to the Terminal Server inside, or attach a physical Screen and Keyboard directly to the rack via Cable. Turn on the Server using the power button inside the rack GUI. Insert your OpenOS Floppy Disk into an attached Disk Drive, open your Remote Terminal, and run the 'install' command to load the operating system onto the Server's Hard Disk Drive.
Tip: A single Server Rack can hold up to four mountables, meaning you can run three Servers and one Terminal Server in a single block space.
4Deploy the Access Point Backbone
Run Cable from the side of your Server Rack (ensuring the Server's network line is routed to that side in the rack GUI) to an Access Point block placed high up in your base. Open the Access Point GUI to adjust its signal strength; higher strength covers more distance across your base but drains more energy per packet sent. This block will act as a repeater and bridge between your wired rack infrastructure and wireless client computers.
Tip: In later versions of OpenComputers, the Relay block equipped with a Wireless Network Card replaces the standalone Access Point block; check JEI to see which block your modpack version uses.
5Set Up Remote Wireless and Linked Nodes
Build a standard Computer Case setup at a distant machine room in your base and install a Wireless Network Card inside it. For a second, ultra-distant location (such as a quarry in another dimension), build another computer and install the second Linked Card from the pair you created in Step 1. Boot both remote computers into OpenOS.
Tip: Linked Cards are crafted in pairs and are cryptographically bound to one another; if you lose one, the other becomes useless, so label them carefully with an Anvil.
6Open Ports and Transmit Modem Messages
On your central Server, open the Lua interpreter by typing 'lua'. Load the component library with 'component = require("component")' and 'event = require("event")', then open a listening port with 'component.modem.open(123)'. Follow this with '_, _, from, port, _, message = event.pull("modem_message")' and 'print(message)' to make the server wait for incoming data. On your wireless client computer, enter the Lua prompt and run 'component.modem.broadcast(123, "Hello Server")' to send a wireless packet across the base and watch it appear on your Server screen.
Tip: Before broadcasting over distance, run 'component.modem.setStrength(400)' (or your card's maximum supported range) on the transmitting computer, otherwise the default low signal strength might not reach the Access Point.
7Transmit Across Dimensions via Linked Card
To communicate with your cross-dimensional outpost, use the tunnel API rather than the modem API. On the central Server, run 'event = require("event")' and pull a message using '_, _, from, port, _, msg = event.pull("modem_message")'. On the remote outpost computer with the paired Linked Card, open the Lua prompt and run 'component.tunnel.send("Status Report: OK")'. Because Linked Cards form a dedicated point-to-point quantum tunnel, you do not need to open a port number or set signal strength.
Tip: Notice that even though you send data using 'component.tunnel.send()', the receiving computer still catches the data using the standard 'modem_message' event.
How it works
OpenComputers networking mimics real-world network topology but simplifies packet handling into direct component calls and OS events. The Server Rack acts as a high-density chassis and an internal switchboard. When you toggle the coloured routing lines inside the Server Rack GUI, you are physically isolating or bridging the internal buses of the mounted Servers. If two Servers in the same rack are connected to the same internal line, their Network Cards can communicate internally with zero latency and without needing external Cable.
Wireless networking relies on distance geometry and energy expenditure. When a Wireless Network Card calls 'broadcast()' or 'send()', the mod calculates the Euclidean distance between the transmitting block and all loaded Wireless Network Cards or Access Points in the same dimension. If the configured signal strength is greater than or equal to the block distance, the receiving card triggers a 'modem_message' event in its computer's event queue. Access Points (or Relays) listen for wireless packets and automatically forward them onto connected wired Cables and re-broadcast them wirelessly, acting as range extenders.
Linked Cards bypass distance and dimensional checks entirely by sharing a unique internal channel ID assigned at the moment of crafting. Instead of exposing the 'modem' component API, a Linked Card exposes the 'tunnel' component API. Because a tunnel only ever has two endpoints, port management is completely stripped away; any data passed into 'tunnel.send()' is placed directly into the partner card's event queue as a 'modem_message' on virtual port 0, provided both chunks are loaded and both computers have sufficient power.
Common mistakes
- Forgetting to set wireless signal strength: Wireless Network Cards default to a strength of 0 or a very short range upon installation. Always call 'component.modem.setStrength(value)' in your startup scripts before broadcasting.
- Misconfiguring Server Rack internal routing: If your Server cannot see an external Disk Drive or Cable network, open the Rack GUI and verify that the Server's node lines are actually bridged to the corresponding external face of the Rack block.
- Installing two Network Cards without addressing them by UUID: If a Server has both a wired Network Card and a Wireless Network Card, calling 'component.modem' will only grab the primary card. You must use 'component.proxy(address)' with each card's unique UUID to control which interface sends the packet.
- Expecting Linked Cards to load chunks: Linked Cards can send messages across thousands of blocks or between dimensions, but if the chunk containing the receiving computer is unloaded, the packet is silently dropped.
FAQ
Why does my Server say 'No bootable medium found' when I turn it on inside the Rack?
You either forgot to insert a pre-installed OpenOS Hard Disk Drive into the Server item inventory, or your external Disk Drive containing the OpenOS Floppy is placed on a side of the Server Rack that is not connected to that Server in the rack's GUI wiring lines.
What is the difference between Tier 1 and Tier 2 Wireless Network Cards?
Tier 1 Wireless Network Cards have a much smaller maximum signal range and only support basic wireless transmission, whereas Tier 2 cards support a much larger radius and can also act as wired network cards simultaneously. Check the in-game manual or configuration files for exact block range numbers in your modpack.
Can I wake up a powered-off Server over the wireless network?
Yes. Execute 'component.modem.setWakeMessage("your_password")' on the Server before shutting it down. When another computer broadcasts that exact string as a message to the Server's port or address, the Server will automatically boot up.
How do I prevent other players on a multiplayer server from intercepting my wireless messages?
Use 'component.modem.send(address, port, data)' instead of 'broadcast()' to target a specific card's UUID, or use Linked Cards for sensitive commands since their point-to-point tunnel cannot be sniffed by external wireless cards.
By combining the high-density computing of a Server Rack with Access Points for local wireless coverage and Linked Cards for cross-dimensional tunnels, you now have a scalable network backbone capable of controlling your entire base from a single Remote Terminal.