
OpenComputers · Getting started · Beginner
How to Build Your First Computer and Install OpenOS
In this guide, you will learn how to assemble your very first modular Tier 1 computer in OpenComputers and install the standard OpenOS operating system onto its hard drive. Mastering this initial setup is essential because it provides the foundational terminal required to write Lua scripts, control redstone, and automate complex factory systems.
What you need
- Computer Case (Tier 1)
- Screen (Tier 1)
- Keyboard
- Disk Drive
- Power Converter (and an external power source like an RF or EU generator, unless energy is disabled in your config)
- Central Processing Unit (CPU) (Tier 1)
- Memory (Tier 1 or Tier 1.5, two sticks recommended)
- Graphics Card (Tier 1)
- Hard Disk Drive (Tier 1)
- EEPROM (Lua BIOS)
- OpenOS (Operating System) Floppy Disk
Step by step
1Place the Core Blocks
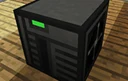
Start by placing your Computer Case (Tier 1) on the ground or a desk. Place the Screen (Tier 1) and the Disk Drive directly adjacent to the Computer Case so they touch it. Alternatively, you can connect these components over a distance using OpenComputers Cables, as long as they form a continuous network.
Tip: You can place multiple Screens of the same tier adjacent to each other to form a larger multi-block monitor, though a single block is enough for basic setup.
2Attach the Keyboard
Hold the Keyboard in your hand and right-click directly onto the Screen block to mount it. You can attach it to the front, side, or even on top of a desk block right in front of the screen. The Screen must have a Keyboard directly attached to it, otherwise you will only be able to look at the display without typing.
Tip: Hold Shift while placing the Keyboard to ensure you do not accidentally open a GUI.
3Connect the Power Supply
Place a Power Converter adjacent to your Computer Case or anywhere along its connected Cable network. Hook up a power cable or generator from another tech mod (such as Redstone Flux or Forge Energy) to the Power Converter. The Converter translates external mod energy into the internal energy format used by OpenComputers.
Tip: If you are playing only with OpenComputers and no other tech mods, power requirements are automatically disabled and you can skip this step.
4Install Internal Hardware Components
Right-click the Computer Case to open its internal inventory slots. Notice that each slot has a background icon indicating the component type, and Roman numerals (I, II, III) showing the maximum Tier allowed. Insert your CPU (Tier 1), Memory, Graphics Card (Tier 1), Hard Disk Drive (Tier 1), and the EEPROM (Lua BIOS) into their matching slots.
Tip: Be sure you are using a programmed 'EEPROM (Lua BIOS)' and not a blank EEPROM, which can be crafted by combining a blank EEPROM with a Book in a crafting grid.
5Insert the OpenOS Floppy Disk
Right-click the Disk Drive block to open its single-slot inventory. Place the green OpenOS Floppy Disk inside. Because the Tier 1 Computer Case does not have an internal floppy slot, this external Disk Drive is mandatory for reading the installation media.
Tip: You can craft the OpenOS Floppy Disk by combining a standard Floppy Disk with an OpenComputers Manual in a crafting grid.
6Boot the System
Open the Computer Case GUI again and click the circular Power button on the left side. You should hear a beep and see the button light up green. Exit the case GUI and right-click the Screen to zoom into the terminal interface, where you will see the system booting into a command prompt.
Tip: If the computer beeps multiple times and refuses to boot, read the error message displayed on the screen; it usually tells you exactly which internal component is missing.
7Install OpenOS to the Hard Drive
Right now, the computer is running directly off the read-only Floppy Disk, meaning you cannot save any files. Type the command 'install' into the terminal and press Enter. When prompted to confirm the target drive, type 'y' and press Enter to copy the operating system files onto your internal Hard Disk Drive.
8Reboot and Eject the Floppy
Once the copying process reaches 100%, the terminal will ask if you want to reboot now. Type 'y' and press Enter, then quickly remove the OpenOS Floppy Disk from the Disk Drive. Your computer is now booting independently from its own Hard Disk Drive and is ready for programming!
Tip: You can now reuse that single OpenOS Floppy Disk to install the operating system on any new computers or robots you build in the future.
How it works
OpenComputers simulates real-world computer architecture rather than giving you a magic single-block machine. Every component serves a logical hardware purpose: the CPU controls how many operations happen per tick, the Graphics Card talks to the Screen to render text, and the Memory (RAM) determines how complex your running programs can be. Without a Graphics Card, the computer actually runs fine in the background, you just have no way to see its output.
The boot sequence also mirrors reality. When you press the power button, the CPU only knows how to read the tiny script stored on the EEPROM (the Lua BIOS). The BIOS simply tells the computer to search all connected storage drives for a file named 'init.lua'. Initially, it finds this file on your OpenOS Floppy Disk. By running the 'install' command, you copy those system files onto the blank Hard Disk Drive so the BIOS can boot from internal storage instead.
Finally, the block network operates on a shared bus system. Any block touching the Computer Case—or linked to it via OpenComputers Cables—shares both power and data. This is why a single Power Converter can energize your Case, Screen, and Disk Drive simultaneously, and why the Keyboard must be placed directly on the Screen so the system knows which input belongs to which monitor.
Common mistakes
- Using a blank EEPROM instead of a Lua BIOS EEPROM: A blank EEPROM contains no code, causing the computer to throw a 'no bootable medium' or BIOS error immediately. Craft the blank EEPROM with a vanilla Book to flash the Lua BIOS onto it.
- Placing the Keyboard next to the Case instead of on the Screen: The Keyboard must be physically mounted onto a face of the Screen block (or directly adjacent and facing it appropriately) to bind to that display.
- Forgetting to install Memory or only using a tiny amount: If you leave the RAM slot empty, the computer will beep loudly and refuse to turn on. Even one stick of Tier 1 Memory can sometimes run out of memory during installation, so filling both memory slots in a Tier 1 Case is strongly recommended.
- Leaving the computer running off the Floppy Disk: If you do not run the 'install' command, your root filesystem remains read-only. You will get permission errors whenever you try to create or save a new Lua script.
FAQ
Why does my computer make a loud beeping sound and show a black screen?
Beep codes indicate a hardware failure during startup. Usually, it means you forgot to insert a CPU, Memory, EEPROM, or Graphics Card. Look closely at the Screen block without opening it—an error text overlay often appears telling you which component is missing.
Can I put Tier 2 components into a Tier 1 Computer Case?
Generally no, except for Tier 1.5 Memory. Every slot inside a Computer Case displays a Roman numeral (I, II, or III) indicating the maximum tier of hardware that specific slot can accept. Check JEI or the in-game OpenComputers Manual for exact slot capacities.
How do I write my first program once OpenOS is installed?
Type 'edit filename.lua' (for example, 'edit test.lua') and press Enter. This opens a built-in text editor where you can type your Lua code. Press Ctrl+S to save your file, and Ctrl+W to exit back to the command prompt.
What happens to my running programs when I log out or unload the chunk?
OpenComputers features state persistence. Unlike many other computer mods that reboot when chunks reload, your computer saves its exact execution state and seamlessly resumes running its script right where it left off.
By combining a Tier 1 Computer Case with essential internal hardware, connecting a Screen, Keyboard, and Disk Drive, and running the OpenOS installer, you have built a persistent, programmable workstation ready for world automation.