
Powah! (Rearchitected) · Progression · Beginner
Powah! Tier Progression Guide: From Starter to Nitro
This guide walks you through the seven-tier material and machine progression system in Powah! (Rearchitected), taking you from simple Starter components all the way to the massive power output of the Nitro tier. Mastering the Energizing crafting system and the additive machine upgrading loop will allow you to scale your Forge Energy (FE) generation effortlessly without ever throwing away your older equipment.
What you need
- Mod Manual (Powah! in-game guidebook) and JEI/EMI installed for exact recipe costs
- Abundant Redstone, Iron, Gold, Clay, and Coal (for making Dielectric Paste)
- Mid-to-late game vanilla materials: Blaze Rods, Diamonds, Emeralds, and Nether Stars
- An initial source of Forge Energy (a Starter Furnator or other mod generator)
- A Wrench (from Powah! or any compatible tech mod) for safely picking up machines
Step by step
1Produce Dielectric Paste and Starter Components
Every single machine and cable in Powah! relies on an insulating material called Dielectric Paste. Craft a large batch of it in a standard Crafting Table using Coal, Clay, and a heat source like Lava or Blaze Powder (check JEI for the exact ratio in your modpack). Next, convert this paste along with Iron and Redstone into Dielectric Casings, Dielectric Rods, and Tiny Capacitors. These base items allow you to craft your first Starter-tier machines, such as a Starter Furnator and Starter Energy Cables.
Tip: Automate or bulk-craft Dielectric Paste early; you will need thousands of pieces before you reach the Nitro tier.
2Transition from Starter to Basic Tier
Starter tier machines are great for learning the ropes, but their internal buffers and transfer rates are very small. Before you even touch the Energizing mechanic, you can upgrade straight to the Basic tier using standard vanilla Iron, Gold, and Redstone. Craft Basic Capacitors by combining Tiny Capacitors with Dielectric Paste and Iron, then place your existing Starter machine into a crafting grid alongside the new Basic components to upgrade it directly.
Tip: Never trash an old Powah! machine—every single tier serves as a direct crafting ingredient for the tier above it.
3Build the Energizing Setup
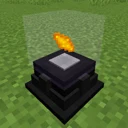
To progress past the Basic tier, you must stop relying on the Crafting Table alone and build an Energizing Orb and at least one Energizing Rod (Starter or Basic tier). Place the Energizing Orb on the ground—it does not accept power cables directly. Instead, place your Energizing Rod within a short distance of the Orb (usually within a few blocks) and run your Energy Cables from your generators directly into the Rod. When the Orb contains a valid recipe, the Rod will shoot a laser beam into the Orb to infuse the items with energy.
Tip: A single Energizing Rod charges very slowly; surround your Orb with four to eight Rods connected to a dense cable line to multiply your charging speed.
4Craft Energized Steel (Hardened Tier)
With your Energizing Orb powered, it is time to unlock the Hardened tier. Right-click one Iron Ingot and one Gold Ingot into the Energizing Orb. Wait a few seconds as your Energizing Rods beam energy into the Orb, fusing the two metals into two pieces of Energized Steel. Use this new alloy to craft Hardened Capacitors, and remember to immediately upgrade your Energizing Rods to the Hardened tier so future crafting recipes complete much faster.
Tip: You can also energize whole blocks of Iron and Gold together to craft Blocks of Energized Steel in bulk.
5Infuse Blazing Crystals (Blazing Tier)
To unlock the fourth tier, head to the Nether and gather Blaze Rods or Blaze Powder. Insert a Blaze Rod (or four Blaze Powder, check JEI for the most efficient option) into the Energizing Orb. The energy requirement is noticeably higher than Energized Steel, so ensure your power generation is steady. Once infused, you will receive a Blazing Crystal, which unlocks Blazing Capacitors and high-efficiency mid-game power options like Blazing Thermo Generators and Magmators.
Tip: Upgrading your Energy Cables to Blazing tier at this point is highly recommended so your power line does not bottleneck your Energizing Rods.
6Create Niotic and Spirited Crystals
Tiers five and six require precious vanilla gems and significantly larger pools of Forge Energy. Place a single Diamond into the Energizing Orb to create a Niotic Crystal (unlocking the Niotic tier), and later place an Emerald into the Orb to create a Spirited Crystal (unlocking the Spirited tier). The FE cost per crystal jumps dramatically here—check the in-game Manual or JEI to see the exact millions of FE required. If your Orb seems stuck, your generators are not producing fast enough or your Rods are too low-tier.
Tip: By the time you reach Niotic tier, build a Niotic Reactor multiblock or a field of Thermo Generators over Blazing Crystal Blocks to handle the massive power draw.
7Reach the Endgame Nitro Tier
The seventh and final tier is Nitro, requiring end-game resources and monumental amounts of energy. Insert one Nether Star, two Redstone Blocks, and one Blazing Crystal Block into the Energizing Orb simultaneously. Once the Orb finishes pumping tens of millions of FE into the ingredients, it will yield a batch of Nitro Crystals. Combine these with your Spirited-tier machines and capacitors in a crafting grid to achieve the absolute maximum power generation and wireless transfer speeds in the mod.
Tip: Be extra careful when automating the Nitro recipe with hoppers or pipes, as inserting duplicate items will jam the Orb.
How it works
Powah! revolves around a strict seven-tier hierarchy: Starter, Basic, Hardened, Blazing, Niotic, Spirited, and Nitro. Rather than making you build entirely new factories from scratch at each stage, the mod uses an additive upgrading logic. Any generator, cable, energy cell, or transmitter from a lower tier is used as the core crafting ingredient for the exact same block of the next tier, combined with that new tier's specific Capacitor and material.
The gatekeeper of this progression is the Energizing Orb mechanic. Unlike standard tech mod machines that have an internal energy buffer and a side configuration menu, the Orb acts purely as a passive pedestal. The actual energy transfer is governed by the Energizing Rods linked to it. Because each tier of crystal requires exponentially more Forge Energy to craft, simply having a huge battery is not enough; you are limited by the maximum FE/t transfer rate of your Rods. Upgrading your Rods alongside your generators is the secret to keeping crafting times down to a few seconds instead of several minutes.
Because the Energizing Orb accepts multiple items into a single unslotted inventory, it checks the exact combination of items inside against its recipe list before calling for power from the Rods. If even one extra item slips into the Orb, the recipe becomes invalid and the Rods will turn off. Understanding this exact-match logic makes it easy to troubleshoot why an infusion hasn't started and prepares you for automating the Orb later on.
Common mistakes
- Connecting Energy Cables directly to the Energizing Orb: The Orb cannot receive power from cables or cells; you must connect your power line to Energizing Rods placed near the Orb.
- Overfilling the Energizing Orb with stacks of items: The Orb has no internal recipe filter and only processes one craft at a time. Dumping a full stack of Diamonds inside will invalidate the recipe and stop the Rods from firing until you pull the extras out.
- Forgetting to upgrade Energizing Rods: Using Starter or Basic Rods to craft Niotic, Spirited, or Nitro crystals will take an eternity because low-tier Rods have a tiny energy beam transfer cap, no matter how much power your base produces.
- Skipping tiers during machine upgrades: You cannot upgrade a Basic Solar Panel directly into a Niotic Solar Panel; you must craft it through Hardened and Blazing tiers in sequential order.
FAQ
Why are my Energizing Rods not shooting lasers at the Orb?
First, check JEI to ensure the exact quantity of items inside the Orb matches a valid recipe with zero extra items left over. If the recipe is correct, make sure the Rods are receiving power and are linked to the Orb (use a Wrench in link mode if you moved the Orb after placing the Rods).
Can I automate the Energizing Orb with hoppers or pipes?
Yes, but for multi-ingredient recipes like Energized Steel or Nitro Crystals, you must use a smart routing system (like a modular router, laser node, or AE2 pattern provider set to blocking mode) so that only one exact recipe set is inserted at a time.
Do machines keep their stored energy when I upgrade them to the next tier?
In most cases, picking up a Powah! machine keeps its energy, and upgrading it in the crafting grid carries that stored FE over into the newly crafted higher-tier block.
Which machine should I upgrade first when unlocking a new crystal tier?
Always upgrade your Energizing Rods first so you can make more crystals quickly, followed immediately by your primary power generators and the Energy Cables connecting them.
By mastering the Energizing Orb setup and systematically upgrading your Energizing Rods and generators through all seven tiers, you can smoothly scale your base from humble Starter components to unstoppable Nitro-tier power.