
Powah! (Rearchitected) · Automation · Intermediate
How to Automate the Energizing Orb (AE2, Refined Storage, and Vanilla Hoppers)
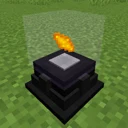
The Energizing Orb is the core crafting apparatus in Powah! (Rearchitected), required for producing essential components like Energized Steel, Blazing Crystals, and Nitro Crystals. However, because the Orb accepts up to six items indiscriminately and only processes valid recipe combinations, naive automation will quickly overfill and jam it. This guide will teach you how to build foolproof, jam-free automation setups using Applied Energistics 2, Refined Storage, or simple Vanilla Redstone.
What you need
- 1x Energizing Orb
- At least 1x Energizing Rod (higher tiers like Blazing or Nitro recommended for speed)
- Powah! Energy Cables and a stable FE power source (such as Furnators, Thermo Generators, or a Reactor)
- 1x Wrench (from Powah! to link rods if needed, though they usually auto-link)
- For Method 1 (Vanilla): 2x Hoppers, 1x Redstone Comparator, 1x Redstone Torch, Building Blocks, and 1x Chest/Barrel
- For Method 2 (AE2): 1x ME Pattern Provider, Blank Patterns, and an item extraction method (Import Bus or Pipe)
- For Method 3 (Refined Storage): 1x Crafter, Patterns, and an Importer
Step by step
1Set Up the Energizing Infrastructure
Place your Energizing Orb in a central location with clear access to at least two of its faces for item input and output. Place one or more Energizing Rods within a 9x9x9 area around the Orb. Connect your Energizing Rods to your main power grid using Powah! Energy Cables. Note that you power the Rods, not the Orb itself.
Tip: Use multiple Energizing Rods of the highest tier you can afford to drastically reduce crafting times, as each Rod adds its transfer rate to the total speed.
2Understand the Jamming Problem
Before attaching automation, open your JEI or the Powah! Manual (requiring GuideME) to look at recipes. Notice that Energized Steel requires two inputs (one Iron Ingot and one Gold Ingot), while Blazing Crystal requires one input, and Ender Cores require three. If you blindly pump a stack of Iron into the Orb, all six internal input slots will fill with Iron, invalidating the recipe and halting production permanently until cleared by hand.
3Method 1 (Vanilla): Place Hoppers for Input and Output
If you do not have a digital storage mod, you can automate single-item recipes (like Blazing, Niotic, or Spirited Crystals) using vanilla mechanics. Place an output Hopper directly beneath the Energizing Orb pointing into a collection chest. Next, place an input Hopper pointing into the side or top of the Energizing Orb, and place an input barrel or chest on top of that Hopper.
Tip: The Energizing Orb has a distinct internal slot for finished products, meaning a Hopper underneath will only pull out finished items and will never accidentally extract uncrafted ingredients.
4Method 1 (Vanilla): Wire the Comparator Lock
Place a Redstone Comparator reading from the side of the Energizing Orb, pointing away from it into a solid building block. Place a Redstone Dust on top of or beside a second block so that when the Comparator outputs a signal, it powers the input Hopper directly. Because the Orb emits a redstone signal whenever it holds at least one item, the first item entering the Orb will immediately trigger the Comparator, locking the input Hopper until the item is crafted and pulled out from below.
Tip: This vanilla setup only works for 1-item recipes. For multi-item recipes without storage mods, you must use modded pipes with round-robin and filter count capabilities.
5Method 2 (AE2): Configure the ME Pattern Provider
For Applied Energistics 2, place an ME Pattern Provider directly against the side or top of the Energizing Orb. Open the Pattern Provider's GUI and find the 'Blocking Mode' button on the left side. Toggle Blocking Mode to enabled (Wait until target inventory is empty before pushing new items). This is the most critical click in the entire setup.
Tip: You can use a directional flat panel ME Pattern Provider on the same block space as your cable to keep the build compact.
6Method 2 (AE2): Encode Patterns and Extract
Using an ME Pattern Encoding Terminal, switch to Processing Pattern mode and encode your Powah! recipes (e.g., 1 Gold + 1 Iron = 2 Energized Steel; check JEI for exact counts). Place these patterns into your Pattern Provider. Finally, attach an ME Import Bus to the bottom of the Orb (or use a third-party item pipe pulling from the Orb directly back into the Pattern Provider) to return finished items to your network.
Tip: If using a pipe to push items back into the Pattern Provider, you save an AE2 channel that would otherwise be used by an Import Bus.
7Method 3 (Refined Storage): Configure the Crafter
For Refined Storage, place a Crafter pointing directly into the Energizing Orb. Right-click the Crafter and change its Redstone mode to 'Redstone pulse inserts next set'. Place an Importer on another face of the Orb to pull finished items back into your RS network. Do not insert patterns yet, as you must first build the redstone trigger.
8Method 3 (Refined Storage): Build the Comparator Inverter
Place a Redstone Comparator reading the Energizing Orb, pointing into a solid block. Attach a Redstone Torch to the side of that solid block, and run Redstone Dust from that Torch back onto the RS Crafter. When an item enters the Orb, the Comparator turns ON, turning the Torch OFF. When the item finishes crafting and is extracted by the Importer, the Comparator turns OFF, causing the Torch to turn back ON and sending the exact single redstone pulse the Crafter needs to insert the next batch.
Tip: When requesting multiple batches in Refined Storage, manually pulse the Crafter once with a button if the Torch is already on and fails to trigger the very first craft, or use an RS Detector set to trigger on 'Autocrafting in progress'.
How it works
The Energizing Orb functions differently from standard furnace-style machines. Internally, it contains a 6-slot input buffer and a 1-slot output buffer. Every tick, the Orb checks the contents of its input buffer against registered energizing recipes. If the exact items match a recipe—and there are no extra, unrelated items in the buffer—the Orb begins calling for Forge Energy (FE) from any linked Energizing Rods within range.
Because the input buffer has no dedicated slots for specific ingredients, standard automation will flood all 6 slots with the first available material. Blocking Mode (in AE2) and Pulse Mode (in RS) bypass this flaw by treating the entire recipe as a single packet. The network injects one complete recipe batch and then physically refuses to send more items until the Orb reports that its internal inventory is completely empty.
For the Redstone Comparator setups, the logic relies on the Orb's container state. The moment items enter the Orb, its fullness becomes greater than zero, emitting a signal strength of at least 1. The Comparator detects this state change immediately. Only when the Energizing Rods finish shooting lasers, the items merge into the output slot, and your extraction hopper/importer pulls the result out does the signal drop back to 0, safely resetting the system for the next operation.
Common mistakes
- Forgetting to enable Blocking Mode on the AE2 Pattern Provider, which causes the system to dump multiple batches of recipes into the Orb at once, instantly breaking the craft.
- Connecting Energy Cables directly to the Energizing Orb instead of the Energizing Rods; the Orb itself cannot accept power from cables and only receives energy wirelessly via the Rods' laser beams.
- Using an extraction pipe without a filter on the Orb when not using dedicated directional slots; while the Orb generally restricts extraction to the output slot, certain modded pipes that ignore sided inventory rules might pull your uncrafted ingredients right back out.
- Placing blocks directly between the Energizing Rods and the Energizing Orb when using aesthetic shaders or expecting clear beams, or placing the Rods outside the maximum wireless linking range (check the Powah! Manual or hover with a Wrench to verify connection).
FAQ
Why are my Energizing Rods not shooting lasers even though they have power and the recipe is inside the Orb?
First, check JEI to ensure the exact item quantities inside the Orb match a valid recipe with no extra items. Second, hold a Powah! Wrench set to Link mode to verify the Rods are actually linked to that specific Orb and are within the 9x9x9 operational range.
How do I speed up the Energizing Orb?
You cannot upgrade the Orb itself. Instead, craft higher-tier Energizing Rods (such as Niotic, Spirited, or Nitro) and place more of them around the same Orb. You can surround a single Orb with dozens of Rods as long as your power generation and Energy Cables can keep up with the FE demand.
Why did my Nitro Crystal automation jam when everything else works?
Nitro Crystal crafting requires 4 items total (1 Nether Star, 2 Redstone Blocks, and 1 Blazing Crystal Block). If your extraction method is too slow, the AE2/RS system might think the inventory is clear during the split-second transition between input and output, or your vanilla hopper setup tried to lock after the first item instead of the fourth. Use AE2 Blocking Mode and ensure your extraction bus is accelerated.
Can I use multiple Pattern Providers or Crafters on a single Energizing Orb?
No, avoid doing this. Two separate Crafters on the same Orb do not communicate well and may push two different recipes simultaneously during the same tick that the Orb becomes empty, resulting in a mixed, jammed inventory.
By combining the Energizing Orb's built-in comparator support or AE2/RS blocking logic with fast item extraction, you can effortlessly automate every tier of Powah! crafting materials without ever worrying about jammed inputs.