
LaserIO · Getting started · Beginner
How to Get Started with LaserIO: Nodes, Wrenches, and Basic Networks
LaserIO is a high-performance logistics mod that lets you transfer items, fluids, energy, and redstone signals wirelessly through compact laser nodes. In this beginner guide, you will learn how to craft the core components, link Laser Nodes together using the Laser Wrench, and set up your first automated item transfer network. Mastering these basics will allow you to build clean, lag-free automation setups capable of interacting with multiple resource types from a single block face.
What you need
- Iron Ingots, Gold Nuggets, Redstone Dust, Lapis Lazuli, Quartz, and Glass (or Glass Panes)
- A Furnace or Smelter (for cooking Raw Logic Chips)
- A Crafting Table
- At least two inventories (such as vanilla Chests) to test your first item transfer
- JEI (Just Enough Items) or the in-game Patchouli book ('LaserIO') for checking exact recipes
Step by step
1Craft and Smelt Logic Chips
Every component in LaserIO relies on a base crafting material called the Logic Chip. Open your Crafting Table and combine Redstone Dust, Gold Nuggets, Quartz, and Clay (check JEI for the exact arrangement in your modpack) to craft Raw Logic Chips. Place these Raw Logic Chips into any standard Furnace and smelt them to produce finished Logic Chips.
Tip: Automate or bulk-craft Logic Chips early on, as you will need them for every node, wrench, card, and upgrade in the mod.
2Build Laser Connectors and Laser Nodes
Before making the main nodes, craft Laser Connectors using Glass, Redstone Dust, Iron Ingots, and a Logic Chip. Next, surround a Laser Connector with Iron Ingots and Glass Panes in your Crafting Table to create Laser Nodes. You will need at least two Laser Nodes to establish a basic point-to-point transfer network.
Tip: Laser Nodes do not block movement and have a small hitbox, making them easy to hide behind machines.
3Craft the Laser Wrench
To link your nodes together, you need a Laser Wrench. Craft it using Iron Ingots, a Logic Chip, and Redstone Dust. The Laser Wrench is your primary configuration tool used to establish wireless laser connections between nodes.
4Place Nodes Next to Inventories
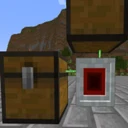
Place two Chests a few blocks apart from each other. Place one Laser Node directly against the first Chest, and the second Laser Node directly against the second Chest. Ensure the two Laser Nodes are aligned along a cardinal direction (North, South, East, West, Up, or Down) with a clear line of sight or within the mod's connection range.
Tip: Standard Laser Nodes connect in straight lines up to 8 blocks away. If you need diagonal or longer-range connections later, look up the Advanced Laser Connector in JEI.
5Link the Nodes with the Laser Wrench
Hold the Laser Wrench in your main hand. Shift-Right-Click the first Laser Node to select it as the link source; it will highlight to confirm selection. Next, simply Right-Click (without holding Shift) on the second Laser Node. A red laser beam will appear between the two blocks, confirming they are now part of the same wireless network.
Tip: To disconnect linked nodes, repeat the exact same process: Shift-Right-Click the first node, then Right-Click the connected node.
6Craft Two Item Cards
Linked nodes form a network, but they do not do anything until you give them instructions using Cards. Craft two Item Cards by combining a Logic Chip, Redstone Dust, Gold Nuggets, and Lapis Lazuli (or Iron/Quartz depending on your version; verify in JEI). These cards tell the nodes how to interact with adjacent inventories.
7Configure Extract and Insert Cards
Hold an Item Card in your hand and Right-Click in the air to open its internal settings, or Shift-Right-Click directly on the card once it is inside a node. Click the mode button at the top of the card GUI until the first card is set to 'Extract' mode. Open the second Item Card and change its mode to 'Insert'.
Tip: You can also adjust theカード's mode outside of its GUI by Shift-Right-Clicking the card directly in the node inventory slot to cycle between In, Out, and Stock modes.
8Insert Cards into the Specific Block Faces
Right-Click the first Laser Node on the exact side (the solid flat plate) facing your source Chest to open that face's inventory. Place your 'Extract' Item Card into one of the nine grid slots. Walk over to the second Laser Node, Right-Click the side facing your destination Chest, and place the 'Insert' Item Card into its grid. Put items into the first Chest, and watch them immediately transfer to the second Chest!
Tip: If you cannot reach the exact face touching the chest, open any face of the Laser Node and use the directional tabs on the left side of the GUI (North, South, East, West, Up, Down) to switch to the correct side.
How it works
LaserIO separates network wiring from resource handling. A Laser Node acts purely as a directional hub with six distinct faces (North, South, East, West, Up, and Down). Each face operates independently and contains nine slots for cards. Because cards handle the logic, a single face touching a machine can simultaneously extract items, insert fluids, supply energy, and read redstone signals without needing four different pipes.
The network itself operates on a channel and Push/Pull logic system. When an Item Card is set to 'Extract', it actively pulls items from the adjacent inventory on that specific face and broadcasts them into the laser network on its assigned colored channel (Default: Orange). It searches the connected network for any Item Card set to 'Insert' on the matching colored channel and instantly teleports the items to that destination inventory.
Because the laser beams between nodes are just logical bridges, items do not physically travel along the beams—they transfer instantaneously upon every extraction tick. You can daisy-chain dozens of Laser Nodes together; as long as they are connected by lasers, an Extract card at one end of your base can reach an Insert card at the other end.
Common mistakes
- Putting the card into the wrong node face: Each Laser Node has 6 internal inventories—one for each direction. If your Chest is to the North of the node, placing an Extract card in the South tab will do nothing. Look at the visual arms extending from the node to see which side is active.
- Trying to connect standard Laser Nodes diagonally: Standard Laser Nodes only connect in straight cardinal lines within an 8-block range. If your nodes are offset diagonally, the wrench will fail to link them. Use an Advanced Laser Connector for diagonal or cross-dimensional links.
- Mismatched color channels: Every card defaults to the Orange channel. If you accidentally click the channel button in the card's GUI and change the Extract card to Blue while leaving the Insert card on Orange, items will not transfer.
- Leaving the card in its default 'Insert' mode on both ends: Newly crafted cards default to Insert mode. A network with two Insert cards and no Extract card will never move any items.
FAQ
Why isn't the red laser appearing when I link two Laser Nodes?
Check two things: first, ensure both nodes are perfectly aligned in a straight horizontal or vertical line. Second, verify they are no more than 8 blocks apart. Also make sure you Shift-Right-Click the first node and normal Right-Click the second node with the Laser Wrench.
How do I make items transfer faster?
By default, an Item Card only extracts 1 item every 20 ticks (1 second). You can craft Node Overclockers and Card Overclockers (check JEI for recipes) and insert them directly into the open slots inside the Item Card's GUI to drastically increase stack size and tick speed.
Can I put Item, Energy, and Fluid cards in the exact same node face?
Yes! That is the biggest strength of LaserIO. Each face of a Laser Node has 9 slots, allowing you to mix and match up to 9 different cards (Items, Fluids, Energy, and Redstone) interacting with the same side of a machine.
Does the laser beam damage players or get blocked by walls?
No. The laser beam is completely harmless and is only a visual indicator of the logical connection. Furthermore, standard node lasers pass right through solid blocks and walls without interruption.
By crafting Logic Chips, placing Laser Nodes, linking them with a Laser Wrench, and configuring Extract and Insert cards on the proper block faces, you now have the foundation to build clean, multi-purpose wireless logistics networks in LaserIO.